Doxygen site
I quote the above site, the officail site of Doxygen.
Doxygen is the de facto standard tool for generating documentation from annotated C++ source but it also supports other popular programming languages such as C, objective-C, C#, PHP, JAVA, Python, IDL(Corba, Microsoft, and UNO/OpenOffice flavors), Fortran, VHDL, Tcl, and to some extent D.
Doxygen can help you in three ways :
-
It can generate an on-line documentation browser (in HTML) and/or an off-line reference manual (in LATEX) from a set of documented source files. There is also support for generating output in RTF (MS-Word), PostScript, hyperlinked PDF, compressed HTML, and Unix man pages. The documentation is extracted directly from the sources, which makes it much easier to keep the documentation consistent with the source code.
-
you can configure doxygen to extract the code structure from undocumented source files. this si very useful to quickly find your way in large source distributions. Doxygen can also visulize the relations between the various elements by means of including dependecy graphs, inheritance diagrams, and collaberation diagrams, which are all generated automatically.
-
You can also use doxygen for creating normal documentation (as I did for the doxygen user manual and web-sit).
Doxygen Download
The GIT repository for doxygen is hosted on GitHub, In this repository, you can be find the lates “bleeding edge” version of doxygen.
If you have GIT installed. you shoudl do the following to get the initial copy of the repository :
$ git clone https://github.com/doxygen/doxygen.git
$ cd doxygen
After that you can use
$ mkdir build
$ cd build
$ cmake -G "Unix Makefiles" ..
$ make
To force a fresh build after an earlier check-out simple remove the build directory and redo the steps above.
After the binaries have been built, you can use.
make install
to install them.
if you just want to download sources and Binaries.
visti official site’s Download page of Doxygen
Doxygen Maunal
Doxygen install
Before installing the Doxygen, You have to this utility.
-
The GNU tools flex, bison, libiconv, and GNU make, and strip
-
so as to generate a Makefile for your platform, you need cmake version 2.8.12 or later
-
In my case, I did’t have libiconv, strip on my Centos 7.
Next, To take full advantage fo doxygen’s features, You need to install the following additional tools.
-
First you need Qt for GUI front-end doxywizard.
-
In my case, I need a version of 4.3 or higher but 5.x.
   #For qt-4.8
   $sudo yum insatll qt-devel
-
Seconde, You need Tex Live for PostScript, and PDF output
-
BUT, I don’t use this tools that’s because I don’t want those outputs.
-
maybe I would need this tools,but for practicing, I decided to install this tool, If you want to know details
   # After unpacking the download file
   $sudo ./install-tl
   Enter command : I
   # In text command, case is sensitive.
-
Third, You need graphviz tool
-
How to install
    #In my case,
    $ sudo yum install graphviz
    #If you don't do like this, Just visit graphviz site,and then you should search for way to install.
-
Fourth, For formulas in the HTML ouput(when MathJax is not used) or in case you do not wish to use ‘pdflatex’. you need the ghostscript. here is the place-www.ghostscript.com that give you a hint about how to install the ghostscript.
-
In my case, owing to this article, I decided to install text live.
In my case, Summary to install Doxygen
# basic clone git repoistory of doxygen
$ git clone https://github.com/doxygen/doxygen.git
$ cd doxygen
# I need a little additional process.
#for Qt-4.8
$sudo yum install qt-devel
# skip Tex Live
# for graph visulaization
$sudo yum install graphviz
$cd doxygen
$mkdir build
$cmake -G "Unix Makefiles" ..
# for use of GUI
$cmake -Dbuild_wizard=YES ..
# for checking my options
$cmake -L ..
$make
$sudo make install
#After the above instructions.
# type doxywizard
$doxywizard
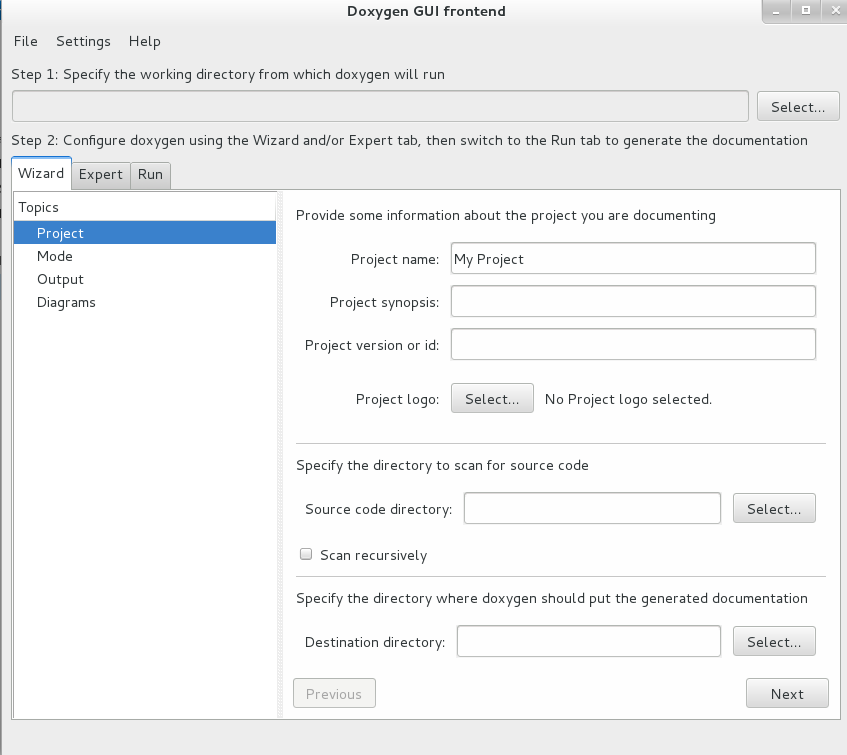
The following figure is after type doxywizard
The following figure shows the relation between the tools and flow fo information between them.

Getting started
I want option that I can see about flow of function and class(structure).
on the above figure,
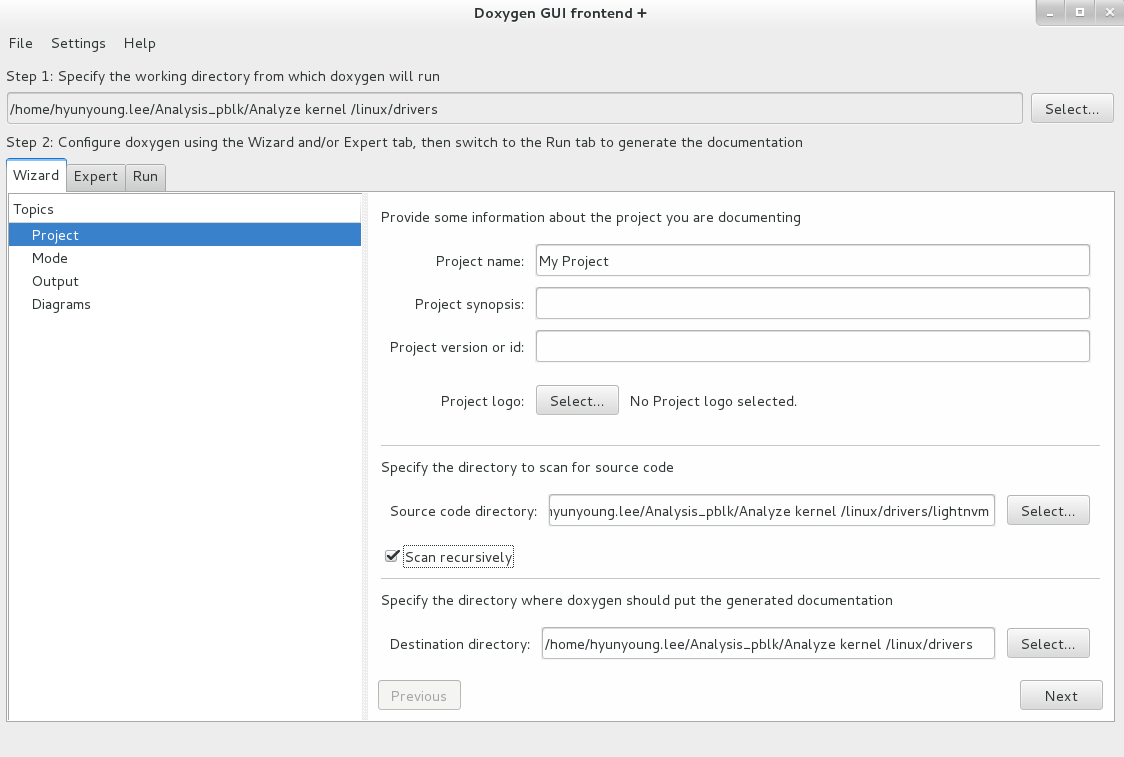
Step 1.
Step 1-1 is needed to run doxygen’s the result.
step 1-2 is just the location of source code for you to analyze. (Source code directory)
* Destination directory : loction of output.
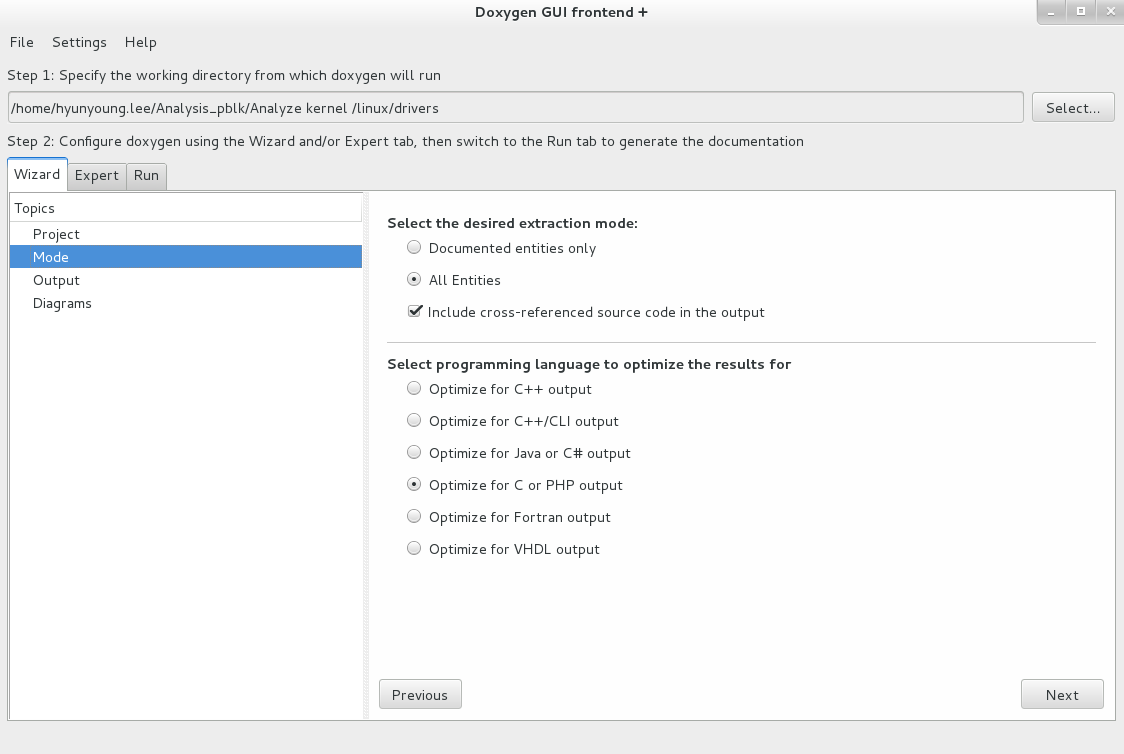
Step 2.
Basically, You have to configure how to extract result from source.
In my case, all entities for C code. because of analysis of kernel code.
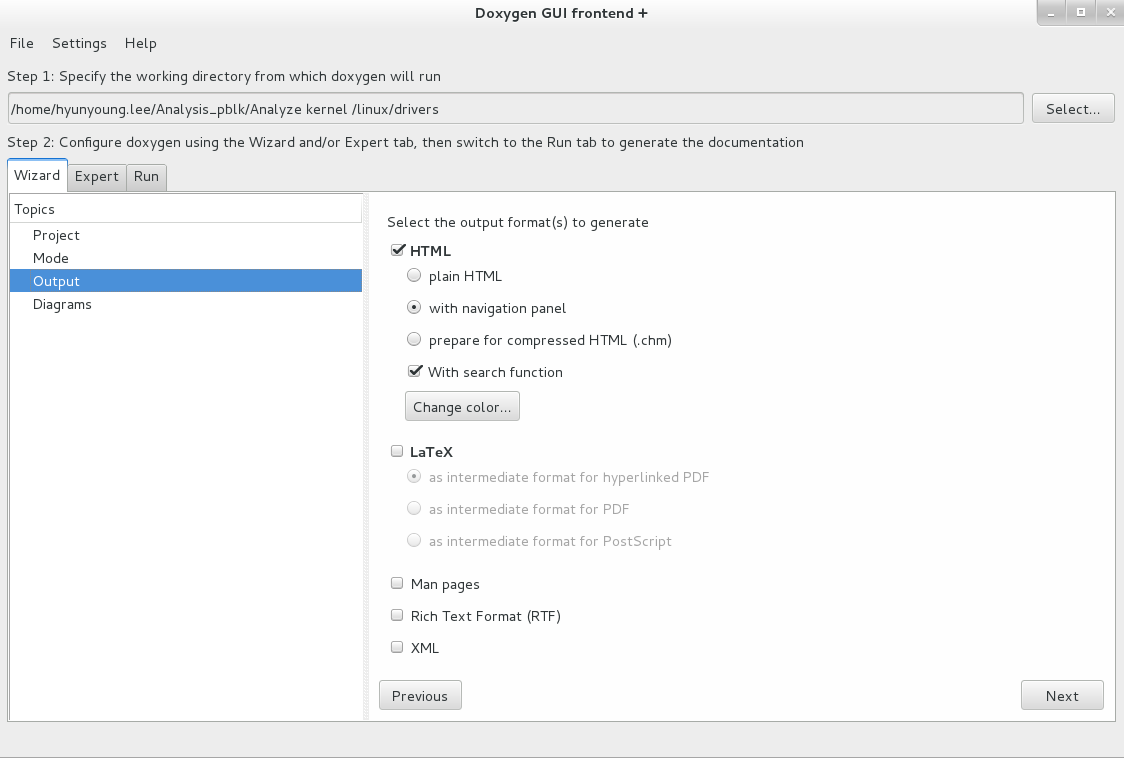
Step 3.
how to put output, In my case, just HTML
Step 4.
how to draw your diagram of analysis of code. in my case GraphViz
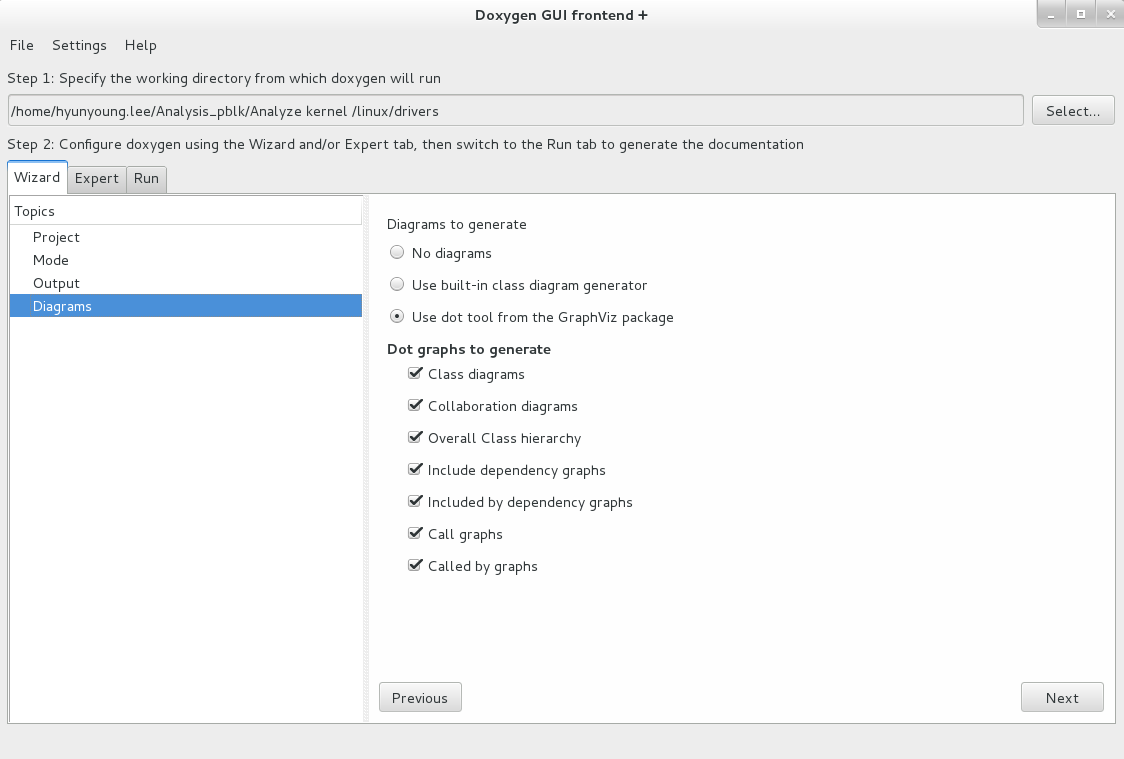
Step 5.
More detailed configuration.
In my case, I had to be careful of Several topics, Project, Build, Source Browser, Preprocessor or input.
In Project, In step 1, basically, this is configured.
In Build, ones of options is EXTRACT_ALL, EXTRACT_STATIC
In Input. you choose more INPUT, RECURSIVE, and FILE_PATTERNS.
In Source Broswer, this makes me comfortable with searching for code in HTML.
SOURCE_BROWER, INLINE_SOURCES
In Preprocessor, configuration of PREDEFINED

FORCE_LOCAL_INCLUDES, HTML_TIMESTAMP , GENERATE_HTMLHELP, GENERATE_TREEVIEW(for Searching HTML), HIDE_SCOPE_NAMES
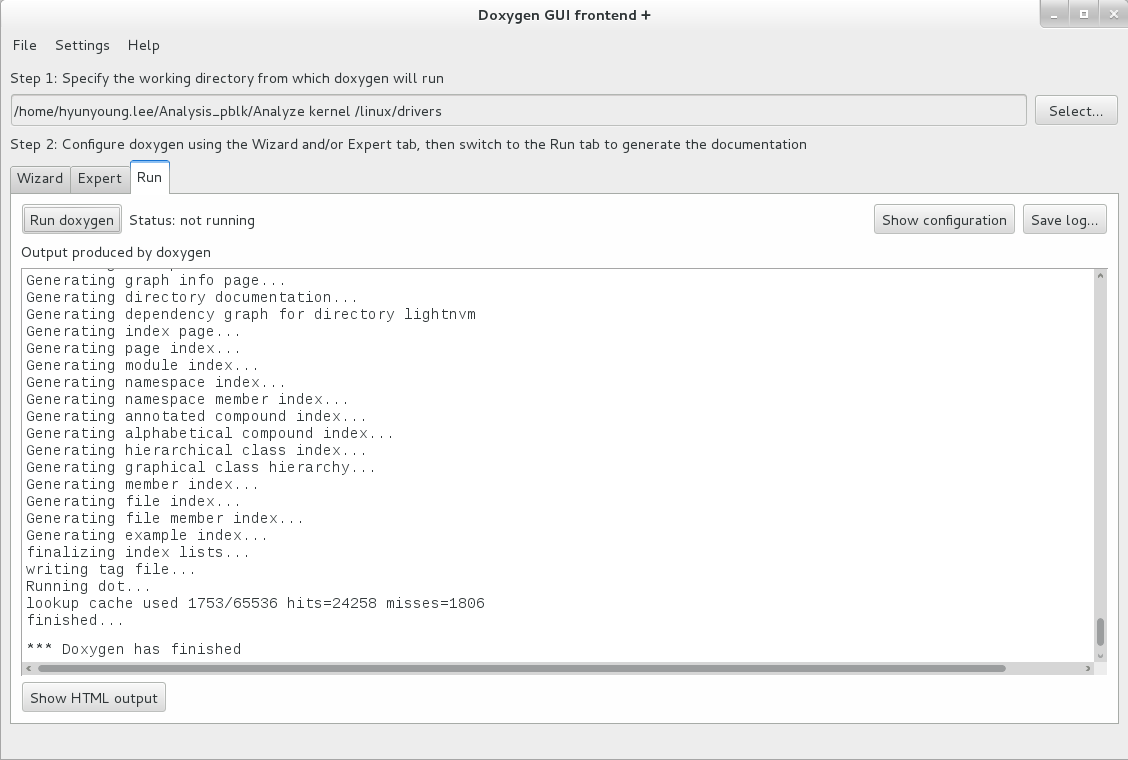
Step6.
Run Doxygen and See the HTML output
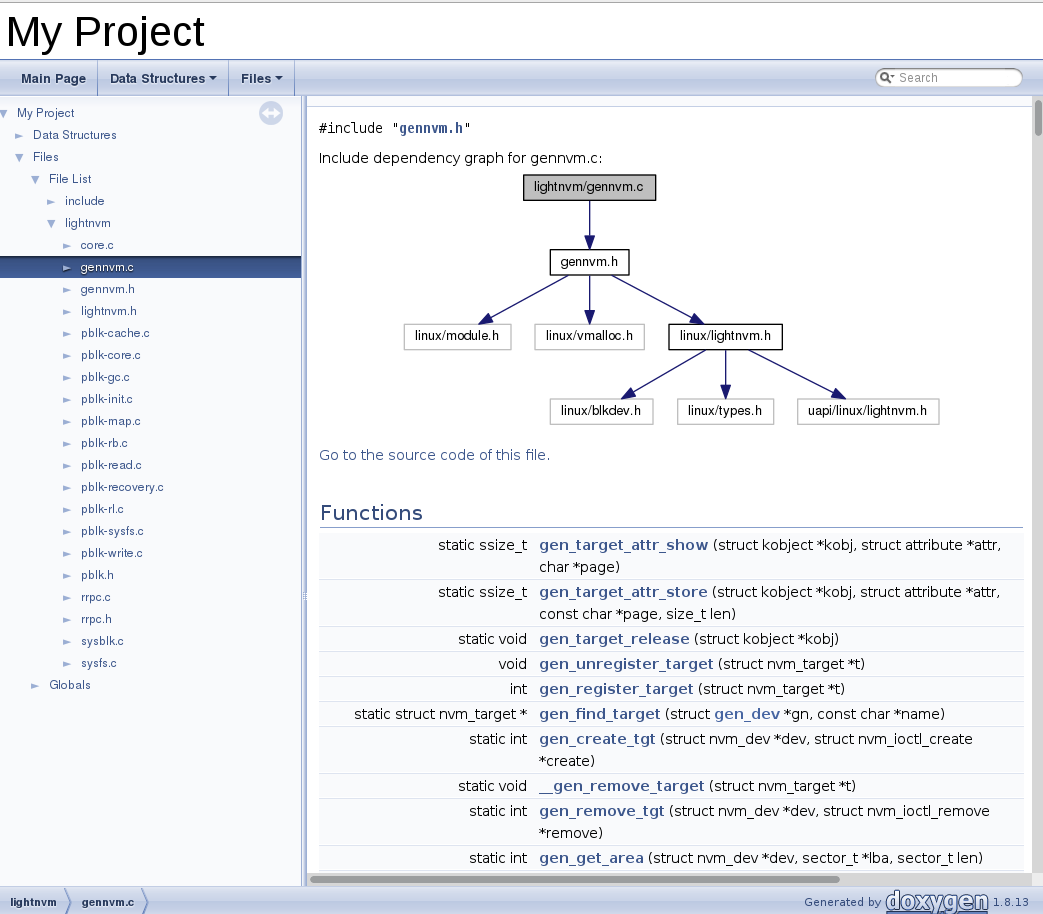
Sample, on my computer
$mkdir build
$cd build
$cmake -G "Unix Makefiles" ..
I entered tha above instruction. and the I got error message,”bash: cmake: command not found…”
So, My action for resolving the above problem is to use yum
$ sudo yum install cmake
After installing cmake.
once again.
$ cmake -G "Unix Makefiles" ..
CMake Error at CMakeLists.txt:14 (cmake_minimum_required):
  CMake 2.8.12 or higher is required.  You are running version 2.8.11


-- Configuring incomplete, errors occurred!
like you can see error message above.
I downloaded the latest CMak tool from Cmake site.
the version fo Cmake is cmake-3.7.0-Linux-x86_64.sh and cmake-3.7.0-Linux-x86_64.tar.gz
In download folder.
chmod 755 cmake-3.7.0-Linux-x86_64.sh
./cmake-3.7.0-Linux-x86_64.sh
cd
cd doxygen
mkdir build
cd build
../../Downloads/cmake-3.7.0-Linux-x86_64/bin/cmake -G "Unix Makefiles" ..
make
sudo make install
APPENDIX A
How to install doxygen with my method.
but the most convenient way is yum.
this site shows you way to install Doxygen with yum
The following is about installing commands
$ sudo yum install doxygen
$ sudo yum install graphviz
The following is about generating cofiguration file of Doxygen.
$ doxygen -g my_proj.conf
The following is part of my_proj.conf I generated to execute doxygen.
# If the CLASS_DIAGRAMS tag is set to YES, doxygen will generate a class diagram
# (in HTML and LaTeX) for classes with base or super classes. Setting the tag to
# NO turns the diagrams off. Note that this option also works with HAVE_DOT
# disabled, but it is recommended to install and use dot, since it yields more
# powerful graphs.
# The default value is: YES.

CLASS_DIAGRAMS         = YES

# You can define message sequence charts within doxygen comments using the \msc
# command. Doxygen will then run the mscgen tool (see:
# http://www.mcternan.me.uk/mscgen/)) to produce the chart and insert it in the
# documentation. The MSCGEN_PATH tag allows you to specify the directory where
# the mscgen tool resides. If left empty the tool is assumed to be found in the
# default search path.

MSCGEN_PATH            =

# You can include diagrams made with dia in doxygen documentation. Doxygen will
# then run dia to produce the diagram and insert it in the documentation. The
# DIA_PATH tag allows you to specify the directory where the dia binary resides.
# If left empty dia is assumed to be found in the default search path.

DIA_PATH               =

# If set to YES the inheritance and collaboration graphs will hide inheritance
# and usage relations if the target is undocumented or is not a class.
# The default value is: YES.

HIDE_UNDOC_RELATIONS   = YES

# If you set the HAVE_DOT tag to YES then doxygen will assume the dot tool is
# available from the path. This tool is part of Graphviz (see:
# http://www.graphviz.org/), a graph visualization toolkit from AT&T and Lucent
# Bell Labs. The other options in this section have no effect if this option is
# set to NO
# The default value is: NO.

HAVE_DOT               = NO
how to install textlive with my way
   #So, I just skip explanation about how to install Tex Live, but, after reading the last requireement. I decidet to install this Text Live.

   #So, I was finding a easy way, after all, I could find out a way to install with yum from [StackExchange site](http://superuser.com/questions/453361/how-can-i-perform-a-full-texlive-installation-all-packages-in-centos).

   #the way is as follows :

   $sudo yum install texlive-*

   # unlike In case i install,

   #you can utilize this way to explain to you how install laxtex from [githubgist](https://gist.github.com/melvincabatuan/350f86611bc012a5c1c6)
   yum -y install texlive texlive-latex texlive-xetex
   yum -y install texlive-collection-latex
   yum -y install texlive-collection-latexrecommended
   yum -y install texlive-xetex-def
   yum -y install texlive-collection-xetex
   Only if needed:
   yum -y install texlive-collection-latexextra